Wednesday, December 4, 2013

Memory Quilt: Wedding Memories


Five years ago a loving Sister and Bridesmaid made a plan - she would get each guest at the wedding to decorate a square of cotton with messages of love. These cotton squares would then be made into a Memory Quilt for the Bride and Groom. Five years later the squares had been decorated but the quilt had not been made. Recently her sister unfortunately got the news that she would have to have a double mastectomy - and she wanted to get the quilt completed to provide love and comfort to her sister after the operation.


I was honored to be asked to help complete this quilt. In my previous post I mentioned the 70+ Fancy Fandango's I had been toiling away on (see above). They were for this quilt. Each corner has a gold Fancy Fandango placed on it. I like that they add some texture to the quilt which would otherwise be perhaps a bit blocky.
 
You can clearly see the flower pattern I quilted all over. This flower design is an adapted from a design that Angela Walters showed me on her Craftsy lesson.


In the central panel there is a Celtic Blessing - it is quilted with hearts - it reads:

-->
"I wish you not a path devoid of clouds,
Nor a life on a bed or roses,
not that you might never need regret,
nor that you should never feel pain.
No, that is not my wish for you. ...


... My wish for you is:
That you might be brave in times of trial,
when others lay crosses upon your shoulders.
When mountains must be climbed,
and chasms are to be crossed,
When hope can scarce shine through.
That your gift God gave you
Might grow along with you
and let you give the gift of joy
to all who care for you. ....


... That you may always have a friend
who is worth that name.
Whom you can trust, and who helps
you in times of sadness.
Who will defy the storms
of daily life at your side. ...


... One more wish I have for you
that in every hour of joy and pain
you may feel God close to you.
This is my wish for you
and all who care for you.
This is my hope for you,
Now and forever."

At the base of the central panel I added some metallic free motion quilting to the Celtic Cross. I also added more Fancy Fandango's and some ribbon that had been kept all that time from the bridal shower. I wanted to make something that looked somewhat bridal bouquet like. The border around the blessing was made my doing a satin stitch over a piece of yarn. It made a very neat and nicely raised ridge for the border.

The label for the quilt is made from a decorated square too. I love this square. 


Here it is all folded up and wrapped in another ribbon from the bridal shower - ready to go to provide love, memories and comfort. 


Technical Info:
Batting: Quilters Dream Wool Batting 100% Wool
Backing Fabric: 110" Wide Quilt Backing Daisy Cream
Top: Client provided decorated cream & brown squares, Quilting Treasures Autumn Speckle Blender Pumpkin, Celebration Outline Rose Metallic Cream, Joy of Life Metallic Gold
Binding: Quilting Treasures Autumn Speckle Blender Pumpkin 
Ribbon: provided by client

Quilting Thread (Top & Bobbin): Sulky® Clear Premier Invisible Thread & Gutermann Decor Metallic Yellow Gold

Monday, December 2, 2013

Doing the Fancy Fandango with Jennie Rayment

 
I think I have mentioned before that my Grandmother was a keen patchworker and knitter. We sadly never got a chance to share the passion together. I also have some UK patchwork royalty in my family too - the wonderful Jennie Rayment. Jennie has been my step-mum for a long long time - although I have none of her actual sewing genius genes - she is a great inspiration to me. Jennie's work is quite incredible and she was able to stop and stay with us in between teaching & Houston. She was kind enough to give my church quilting group a private talk. It was so much fun, witty and so inspirational to us all.


A lot of Jennie's creations are made from manipulating and folding fabric (think origami for fabric fans.) You can see the vast array of quilts she showed us due to the massive pile on the floor. I don't know how she drags everything around the world with her - she is much fitter than I.

One of the things that Jennie showed me was a box made out of what she calls Fancy Fandango's (you can get the pattern of a Fancy Fandango on this DVD). During Jennie's stay I was in the planning stage for a Memory quilt and these Fancy Fandago's really spoke to me.


So what did you do this Thanksgiving season? Because I made 70+ of these little guys ranging from 0.75"- 2" finished size!

Monday, November 25, 2013

Don't like it? Dye it.

My scrap bag runneth over. I don't want to throw anything away and yet I'm not happy with the majority of the materials & colors in there.

I recently watched Quilting & Dyeing Serendipity with Ana Buzzalino - a Quilting Arts Workshop which aired on PBS. After watching I could not wait to reach for a bottle of dye. Ana uses Procion Dyes to dye her work - I didn't have any to hand (yet!) so I reached for a bottle of Tulip Liquid Red dye that I had sitting in the back of my cupboard.


Procion Dyes are interesting as they only dye natural fibers. My bottle of Red Tulip Liquid dye is supposed to dye both natural and synthetic fabrics. I didn't know if this would affect the Sulky variegated rayon thread I had used to quilt little areas.

Time to put together something to experiment with. I literally threw some scraps together in a mad rush, cut into them and added some solid curves. Practised some free motion quilting.


Here is my piece before I dipped it into the red dye. I didn't like it when I jammed it together and I don't like it much better now - although the quilting certainly did add a little interest to it. I do however like how dyeing it makes all the colors blend much more. It evens out the color values/tone. I'm eager to take this experiment (the dyeing not the rushed random piecing!) to a larger piece.

The variegated thread did change a little but not too much - and who ever labeled the green fabric as cotton was telling very big porky pies indeed!


You can see my free motion quilting skills are coming along nicely.


I was so interested in Ana's workshop as it now gives me infinite possibilities when recycling clothes into quilts. I can't wait to see where this new technique takes me.

Tuesday, November 19, 2013

Memorial Quilt: T-shirts

This is not your typical t-shirt quilt.

If you have not had the pleasure with working with t-shirts before - they are much harder to quilt than you would imagine. The material is not conducive to any complex piecing, non bulky seams and free motion quilting. When I was given these t-shirts (from a family whose Grandmother had passed away) I wasn't sure what I would do with the huge array of colors - the t-shirts also vary in their 'stretch', weave/texture, sheen and thickness.


Quilting this quilt was a mammoth effort. I certainly enhanced my arm and shoulder muscles pushing it through Bernie.


The quilting pattern is feathers - into flowers - into leaves - into swirls and finally into curvy lines. I hope that the quilting brings some movement to an otherwise blocky design. This is the back of the quilt. This is the most complex quilting design I have taken on so far - and I do have to thank my Craftsy lesson with Angela Walters for the skills I have picked up here.


I followed the change in colors with the change of free motion quilting patterns. 


Even the binding is from a t-shirt.


After I had finished the quilt I washed the quilt on a hot wash and dried it on a hot wash too - this treatment helps the t-shirts helps to 'settle in' some what to the way I have been asking them to comply.

I'm looking forward to seeing how far I can take quilting t-shirts in the future!

Technical Info:
Batting: Quilters Dream Wool Batting 100% Wool
Backing Fabric: 110" Wide Quilt Backing Butterfly White
Top: Client provided  t-shirts
Binding: Clients provided t-shirts
Quilting Thread (Top & Bobbin): Sulky® Clear Premier Invisible Thread

Wednesday, November 13, 2013

Thanksgiving Tree

It has become time again to change our seasonal tree. We took off the mice, spiders and cobwebs to make our Thanksgiving Tree.


I found some fake autumnal leaf vines on sale at JoAnn's and wound them around the bare branches. Then we picked out some yellow, orange, red, green & brown card and the girls mixed their own paint colors (from green, red & gold) and made hand-prints on the card. 


Once the paint was dry we cut out the hand-prints and hung them on the tree with gold ribbon.


On the back of each hand-print leaf my eldest bunny wrote all the things we were grateful for. Here is their very cute list:

the color green
pasta & meat
blankets
coloring
toys
Castro (our dog)
food
my sister & brother
my scooter
friends
color tree
blanket bunny
gold & silver glitter
TV
paint
chocolate
clothes
Mummy
Daddy
Ariel
bed
my beautiful children
garden
Cinderella
dressing up clothes
leaves
Hilda
Oma (German for Grandma)
Papa
Teddy
the whole entire world


Listening to the girl decide what they were thankful for was so cute - this might well be our new family tradition.

Take a look at the other projects we have done with our tree so far this year:
Valentine Tree
Swedish Easter Tree
Recycled Cherry Blossom Tree
Coffee Filter Butterfly Tree 
Halloween Tree

Monday, November 11, 2013

Machine Quilting Negative Space with Angela Walters

I recently purchased a class from Craftsy - Machine Quilting Negative Space with Angela Walters. It was a really inspiring class with so much information and ideas - all clearly and simply explained. In part of the class Angela shows you how to create a wide range of affects and patterns using swirls, circles & leave patterns. Angela is a born teacher - her emphasis is on simple patterns - that you should have fun with - perfection is not necessary. I was so inspired I grabbed this little quilt I have had lying around for ages and began swirling out a pattern on it.


I have long been pouring over Leah Day's Free Motion Quilting Project designs. But what I felt Angela showed so much more clearly was how to incorporate simple designs together and/or at different scales and voila you can create endless effects and designs. After I finished this portion of her class it was like 'ah ha' moment had clicked in my head and finally - finally - I seem to have made friends with my BSR foot.


I felt totally inspired and surprisingly confident at putting into practice what I had learnt after taking this Craftsy class online. I would recommend it it anyone who is learning to free motion quilt.


This little quilt was made from scraps I had left over from a fun little apron project in March 2009 and it is now available in my Etsy Store.

Tuesday, November 5, 2013

Memory Quilt: Recycled Baby Bedding

I was asked to make some new bedding for a family's little girl (5) who was graduating from her crib/toddler bed into brand new bunk beds. Her toddler bed had various bedding - a bed skirt, sheet, pillows & blanket.


We talked about what would be best and we decided that a duvet cover instead of a quilt would be most utilized.The aim was to make two matching duvet covers for each bunk.

I carefully took all the old bedding apart, washed it all, ironed and began to assess how much fabric we had. The family wanted a very classic calm design and we decided on plain squares - keeping them 5" in size so the duvets would seem classic but still modern.

I am pleased with the result. They look like something out of a Pottery Barn catalog. The flannel duvet covers are so soft and the weight of the quilted top make them feel very expensive - I'm not sure anyone would guess at first glance that these are a recycled project.
 
After I had pieced the tops I attached the quilted tops to cream flannel duvet cover top & added stitched detail using some Gutermann Heavy Duty Polyester Thread in straight lines.


I love how this looks - I will have to use this again on another project.


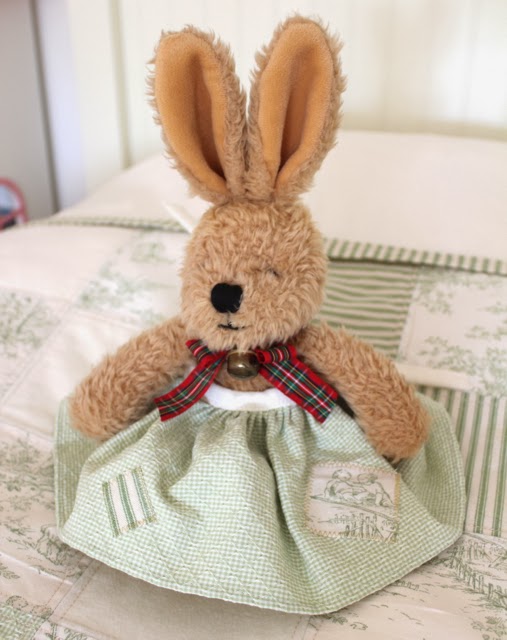
We still had a little bit of fabric left over so I made Teddy a little apron (happily modeled here by Felix the bunny)

 
.... and Teddy also got the cutest sleeping bag too (I haven't let my girls set eyes on this - I just know they would want thousands for all their stuffed toys!)


Here is the little package all together. Duvet on bed, 2nd duvet cover folded, Teddy's apron & Teddy's sleeping bag.


******

Other Recycled quilted projects:
Union Jack Sweater Quilt
9/11 Memorial Firefighters T-shirt Quilt
Memorial Uniform Quilt
Men's Cotton Shirt Quilt