Monday, April 28, 2014

Rainbows and a Blooming Nine Patch

I understand that the blooming Nine Patch Quilt Pattern is an easy pattern to accomplish - but one that looks utterly beautiful. Well the next quilt in the pile from Andrea just brought rays of sunshine and spring to my world.

My new years resolution was to be braver with color. I meant this more of being brave with my thread colors when quilting as I have typically only used white or invisible threads in my early quilts.

Andrea's quilts are so full of color - I wanted to take a serious plunge into color. I decided to use Rainbows thread by Superior. These are an absolutely stunning selection of threads. They have a color change every 1 inch. I do have the Superior color charts at home so I was able to select threads that blended perfectly. The actual colors of the thread do differ from the photos online quite a bit - so the color charts are well worth their small investment. 


I did a swirly feathered medallion design in the middle. 

From the edges in I started with a sepertine line on the purple border ... into feathers ....


... into flowers & leaves ...


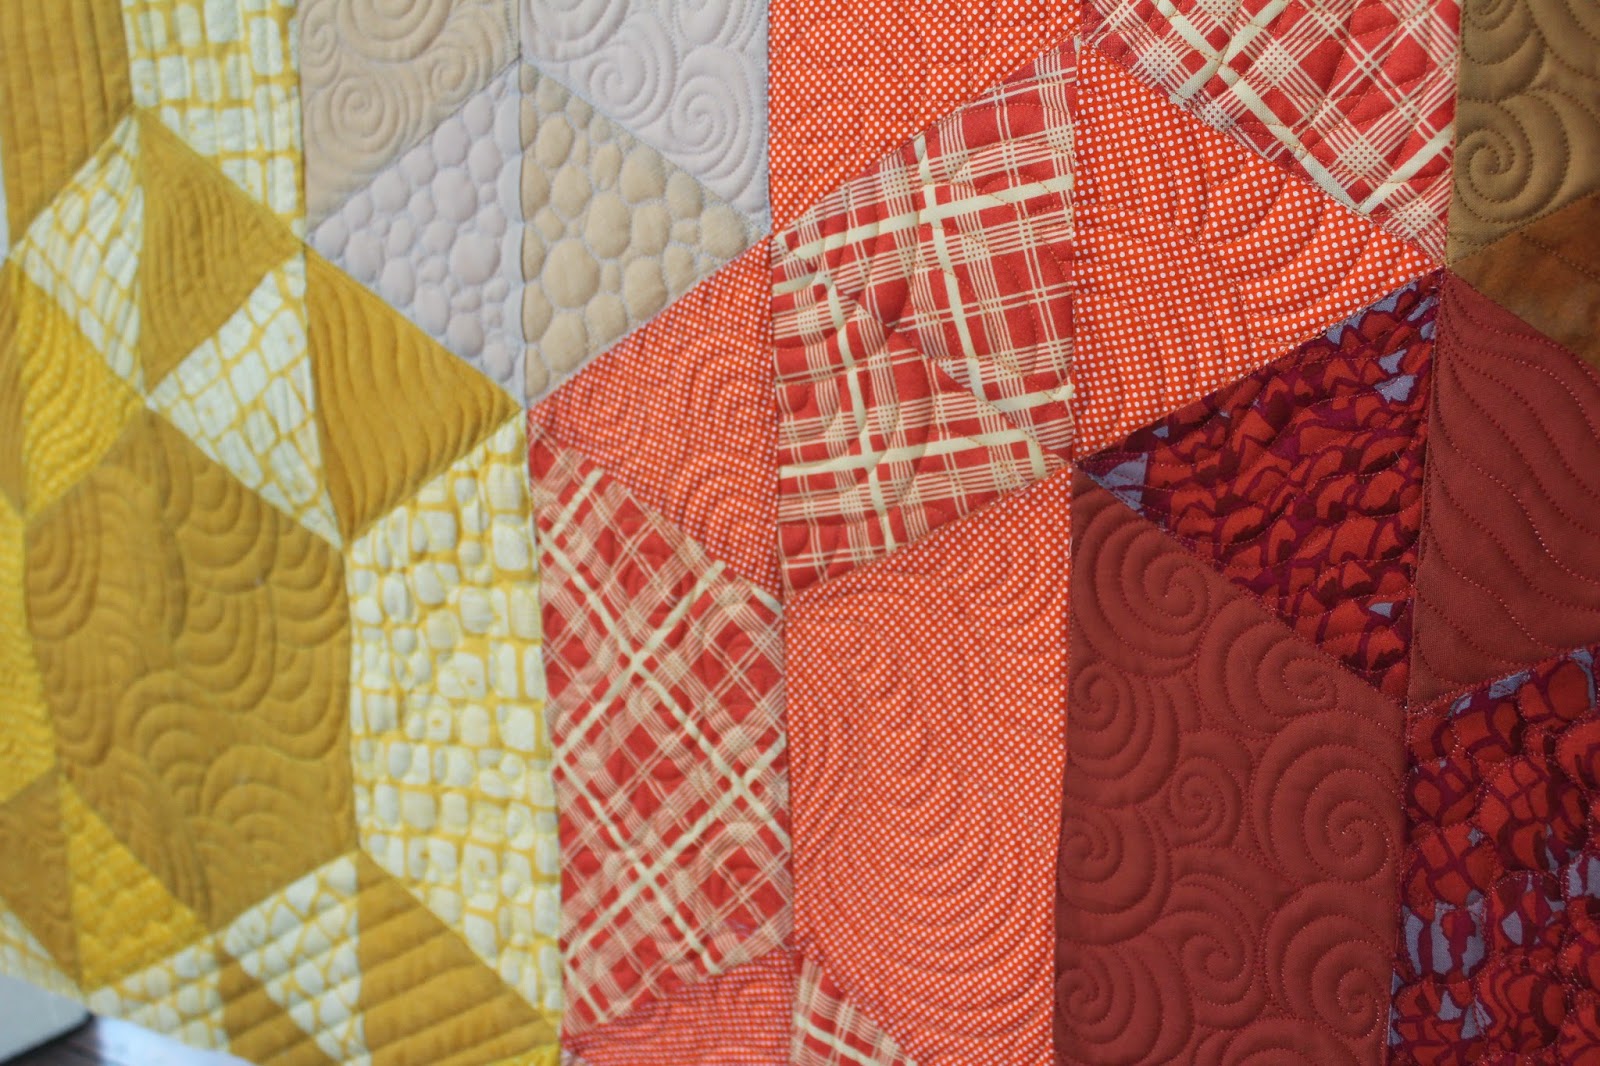
... did I mention how well then beautiful thread blended? ...


.... some more serpentine lines before merging into the feather medallion in the center.


When the sun shone on the quilt the glorious texture was revealed. 


Who needs a flower bed when you have this hanging in your garden?


The quilting process wasn't about its problems. Though I loved this thread and the ending result - it was really hard to use on Freddie. It kept breaking - so the initial progress was very frustrating. It led me on a crazy Google internet search into the thread to find tips on how to handle it (what did we do before Google?). This is how I handled the thread:

Tips on using Rainbow threads on your Handiquilter
- Increased my needle up to a 20 needle
- Loosen the tension on the top & on the bobbin case (Not too much though - I really spent some time playing with the tension to get it right - like 1/2 a day.......)
- Thoroughly cleaned, air dusted & oiled the machine
- I soaked the thread in water (yes - literally held it under a tap for a while) the water really seemed to help
- Don't go too fast

I feel like the thread frustration was worth the result in this case. I really hope that I get up the energy to use this thread again in future - it is SO beautiful even if it was initially a bit problematic.

Thursday, April 24, 2014

WIP: Kids Art Quilt: Turning Your Kids Paintings into Unique Fabric


Here is my 5 year old's first fabric line. We couldn't be more excited!!


The fabric is printed using Spoonflower.

Here is the original painting - all the fabrics are from this one painting. 


I scanned the painting and imported it into iPhoto. I changed the tint, contrast etc to make a pink & blue version of the painting. Then I uploaded the 3 different files to Spoonflower. 


You can see here how changing the repeat of the fabric and the design size can change the look of the fabric. 


The first thing I did when the fabric arrived was to wash it. It was a tad stiff from the printing process. I washed the fabric in a little synthrapol on a standard warm wash - I also added a little fabric softener. This certainly helped to soften the cotton quite a lot. I'm looking forward to sewing with it - but at the same time terrified of cutting into it!!

Spoonflower is really easy to use. I'm so excited by the potential of all the kids art projects being turned into wonderful unique fabrics. I still can't believe one painting made all these different fabrics.


Monday, April 21, 2014

Longarm Quilting Services

It seems that I have inadvertently started a Longarm Quilting service! I got Freddie to help me with the charity I am trying to set up 'Quilting A Memory' - so that I could quilt my memorial and memory quilts in an easier, more effective way and to a better quality.

It is true that Freddie lives in my bedroom. It is true that we are now deeply in love.

So I have decided to post some information about the cost of my longarm quilting services in the sidebar - and if you feel moved to do so - please contact me and I would love to quilt for you. 50% of all quilting costs go to Quilting A Memory. Quilting A Memory is a charity that provides free quilting services to the families of fallen/lost service men & women - making memorial & memory quilts filled with love from their clothes and or uniforms.

So to celebrate posting this - here is a quilt I just finished for a client Maria Gualdoni. Maria was so pleased with the the result of this quilt - she proudly showed it off at a recent guild meeting - which I have to admit felt really good.  I hope you enjoy the quilting eye candy that follows.


And some back quilt candy. 


Thursday, April 17, 2014

Kids Art Quilt: Fabric Building Blocks


This quilt has been finished for a while but I was trying to find a hanging solution for my larger quilts to make photographing them a little easier. (I should of used more quilt hangers but I only had 3 picture hooks at this time.)

This was such a fun quilt to make. I loved that I didn't have to do any designing and my two girls laid it all out for me. To learn about how they designed this quilt you can read more here.


I quilted all the buildings with various straight lines in different directions.


I quilted the 'sky' or negative sky space at least in a pattern I thought might be original - but then I discovered the wonderful and very talented LuAnn Kessi.


The sun is pieced from lots of little bits of orange scraps.


My favorite bit of the quilt is the quilting showing the flight path of the airplane. 


The cars are lightly quilted and I tried to make different textures for the road surface. A miniature square stippling and an edge to edge free hand lines with some bumps & stones in places.


They have both had their birthdays recently and they are now 5 & 3. Do they realize what an amazing job they did with this design for their age? 


Here is my middle bunny looking like she is doing a very professional and through job of inspecting my tension.

I truly love this quilt.

**************

Our other kid painted fabric projects have included:
Kids Art Quilt - Spin Art (WIP)
Kids Art Quilt - Sharpie Art Quilt
Kids Art Quilt - Fabric Building Blocks

Technical Info:
Batting: Hobbs 100% Wool Heirloom Batting & Quilters Dream 100% Cotton Batting (together)
Backing Fabric: Climbing Vine 108" Sage
Top: Scraps from scrap bin & Essential Dotty Waves 108" Wide
Binding: Scraps from scrap bin
Thread: SoFine!#50 by Superior &; Fil-Tec Monofilament thread in bobbin

Tuesday, April 15, 2014

Kids Art Quilt: Sharpie Art Quilt


This is an easy project to do with your little ones. You could make a simple quilt or jazz it up with free motion quilting, embroidery add notions etc. We went with something down the middle of these options.


What you will need:

White fabric squares
Sharpie Permanent Markers - we went with a set of 80's Glam sharpies
Extra fabric for borders, binding & backing
Quilt batting (appropriate size for however big your quilt becomes)

It is as simple as this.

- Ask your little artist to draw on the squares.
- Sew together as desired.
- Quilt, adorn, decorate as desired.
- Show your proud little artist.
NOTE: The sharpies will not wash out when you wash the quilt - but they might bleed a little - we found the light blue to bleed the most. I did prewash our drawn squares before sewing the quilt together - but I think this would be optional - I just tend to wash everything before working with it.


I actually quilted this on Bernie - I did what I guess must almost be thread painting (perhaps thread scribbling?) over the drawn lines and then I added some basic quilting in and around the drawn panels. The great thing about this sort of project is that it doesn't matter how good (or bad) your additions to the blanket it - your little one will love their first art quilt.

Lets take a closer look at some of that art work.


Jack & the Beanstalk

A Pirate on a ship

 Rainbow


Princess & the Pea

Rapunzel (beautiful isn't she!)

A sad moon

What struck me most as I rushed to finish this up was how much Bunny #1's art has improved in just 6 months. Sadly the completion of her art quilt got thoroughly & rudely interrupted by the arrival of Freddie my longarm. Her drawings now are so much more mature & detailed - only one thing for it ... another art quilt??

**************

Our other kid painted fabric projects have included:

Thursday, April 10, 2014

A Quick Quilt

The church contacted me to let me know there was a baptism coming up for 7 year old boy. Thinking that a 7 year old boy would not appreciate a playmat - I decided to make  a quick Twin sized quilt to welcome him into the church community.


The front of the quilt is very simple. Soft deep blue flannel with his name appliqued on the front in a bright green fabric. The quilt has a contrasting orange cotton binding.


I quilted the quilt with a simple swirly pattern. Putting together the quilt (not including the binding) took only 5 hours. And for someone who usually spends a great deal of time & effort on quilts I felt nervous that the result would be lacking. 

Although simple this quilt feels gorgeous - the wool batting, flannel & light quilting design gives is a warm yet very flexible feel. I hope the little chap will enjoy wrapping himself in it.

The bit I am really pleased with though is the back. I pieced the back out of colorful fabric from my stash. The wonderful thing about Freddie is that the quilt leaders have measurements marked along them - which enabled me to get the backing totally lined up - the strips came out perfectly horizontal. The colors remind me of lego somewhat.


I have been asking a lot of people about their opinion on patchwork seams and if they should be pressed open/flat or pressed to one side. There seems to be some debate about this regarding this in the quilting world. But I have decided that pressing your seams open on the backing does make a huge difference. Just look how flat & cleanly that backing sits - even with such light quilting. Delicious!