Wednesday, December 28, 2011

Happy New Year & some crafty resolutions

I hope you all had a wonderful holiday and I wish you every happiness for 2012.

For next year I would like to finish recycling this jumper ...... using this book.
Finish this quilt ... 
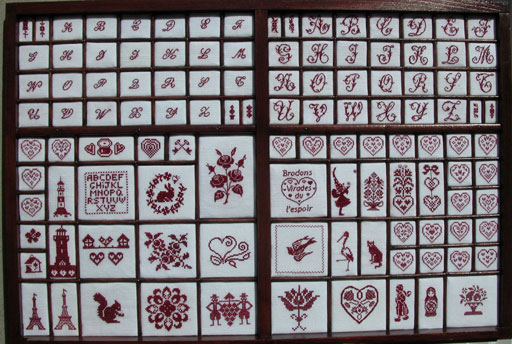
... design is from this book.

Finish this paper pieced quilt.
Turn this ...... into one of these (I can not see me having any time for such a project - but I really really want to do this.)
Put the finishing touches to my pattern for a children's art smock.

And stop eating cake ;-)
Rather a lot of finishing I have to get on with .... see you in 2012!

Monday, December 19, 2011

Recycle Old Holiday Cards into Quick Gift Tags

Its not to late to add those cute finishing touches to the presents all wrapped up under the tree. I like to keep all bows and cards from any occasion and recycle them. This year I have recycled the ribbons and cards from holidays gone by. It really takes no time at all to make your own gift cards and it is great to recycle. Use normal scissors or pinking shears, a hole punch and a bit of ribbon. Some of them are so cute they could pass as brand new gift tags!

Tuesday, December 6, 2011

Candy Cane Mice

Ever since I got Martha Stewarts Handmade Holiday Crafts I've been dying to make these guys. I made a couple of adjustments. I used bobbly wobbly eyes and folded the ears ... ... while hooking the candy cane through the ear loop at the back - which made them perk up a little. The mice are in browns and greys, with little red rudolph noses and colored ear inserts which match the color of their tails.They are just as cute as I dreamed they would be.
UPDATE & TIP: If giving these guys as a gift to children - put them in a cellophane bag - little fingers rip these apart quicker than you can say quick. They also make cute Christmas tree decorations.

Friday, December 2, 2011

Grandma's Hat

A friend of mine lost her Grandma recently - it was a great loss for their family. Grandma left behind a half finished hat for her daughter. I was very touched when I was asked to finish it. Grandma's eyesight wasn't so strong - so there were a couple of mistakes that I tried to cover up with some little flowers. I hope I did it justice.

Monday, November 28, 2011

Coloring Book Quilt

I found a coloring book for Bunny#1. (The Animals Super Doodle Activity Book - illustrated by Simon Abbott and David Crossley - I can not find a link for it.) We spend a lot of time drawing. When we use coloring books we spend even more time talking about the pictures and embellishing the pictures with stickers etc

I thought that these pictures would make really good baby quilts as the pictures are so bold and simple.


Tuesday, November 22, 2011

Giveaway & Tutorial: Santa Gift Sack

Reading A Spoonful of Sugar's Christmas Fabric Gift Pouches made me remember I too had holiday gift bags to make. No precise sewing or much time is needed to make these cute Santa Sacks. Perfect to use as a gift bag, holiday decoration or substitute for a stocking (the girls will be getting these instead of stockings this year.)

Materials:

- a square of hemp, quilt batting and a holiday cotton print - all the same size (I have used 36" squares - but smaller or large squares would also work)
- elastic
- ribbon
  • Layer the three squares - batting, hessian and cotton print wrong side up.
  • Pin layers together and sew around the edge leaving enough of a gap on one side for turning. I used a 1/4" seam. (Tip: A walking foot makes it easy to sew multiple layers together.)
  • Trim seams and turn - sew remaining hole shut.
  • Pin layers together and sew a circle (approx 2.5" from edges) and then another circle 1/2 “ inside first circle.
  • On the cotton print side make small incision between the two sewn circles. Thread elastic through. Pull the elastic as tight as possible. Secure elastic and close incision.
  • Tie bow on front. Add gift tag and any other decorative items as desired.
AND because I have made too many for my needs this year - I am giving away one of these Santa sacks. I'll pick a number at random on 6th of December. Just leave a comment telling me what was the best holiday present you ever received as a child!

Saturday, November 19, 2011

Pompom Christmas Tree Tutorial

I have very early memories of making pompoms. We would cut out wonky circles of cardboard - make wonky holes in them and then awkwardly ... for what seemed like the longest time ... thread yarn through the hole around the wonky cardboard until we could thread no longer. I had this idea for a Pompom Christmas Tree and I thought that there should be some gadget out there that would make pompoms easier to make. The Clover pompom makers gets good reviews - and I liked them a lot too.

Materials
- green yarn
- wooden skewer
- hemp or Christmas wrapping paper
- pot of old Playdoh
- glue
- cling film/saran wrap
- decorative buttons
- ribbon

Equipment
- pompom makers or previously mentioned wonky circles of cardboard in ascending size
- scissors
  • Make your pompoms in ascending size. For my trees I used anywhere between 2-5 pompoms.
  • Put pompoms in ascending size onto a skewer - squish them tightly together and trim. Remember to leave some skewer empty on the base and on the top of the tree.
  • Put glue on to the top of the skewer and shape pom pom at the top.
  • Add any tree topping decoration - I used plastic star shaped buttons.
  • Wrap a lump of old Playdoh in cling film/saran wrap (you can use anything that has weight to it and can be speared with a skewer), then again in hemp or wrapping paper. Secure with a bow.
  • Trim skewer to desired size and put the remaining skewer into the Playdoh. Trim hemp/wrapping paper.

Thursday, November 17, 2011

Homemade Christmas Cards

Draw some shapes on some heavyweight paper.Carefully paint the shapes.
Carefully cut out the shapes and add some glitter in a delicate fashion.
Stick the shapes onto a folded piece of card.
Grandma will love these!