Wednesday, November 13, 2013

Thanksgiving Tree

It has become time again to change our seasonal tree. We took off the mice, spiders and cobwebs to make our Thanksgiving Tree.


I found some fake autumnal leaf vines on sale at JoAnn's and wound them around the bare branches. Then we picked out some yellow, orange, red, green & brown card and the girls mixed their own paint colors (from green, red & gold) and made hand-prints on the card. 


Once the paint was dry we cut out the hand-prints and hung them on the tree with gold ribbon.


On the back of each hand-print leaf my eldest bunny wrote all the things we were grateful for. Here is their very cute list:

the color green
pasta & meat
blankets
coloring
toys
Castro (our dog)
food
my sister & brother
my scooter
friends
color tree
blanket bunny
gold & silver glitter
TV
paint
chocolate
clothes
Mummy
Daddy
Ariel
bed
my beautiful children
garden
Cinderella
dressing up clothes
leaves
Hilda
Oma (German for Grandma)
Papa
Teddy
the whole entire world


Listening to the girl decide what they were thankful for was so cute - this might well be our new family tradition.

Take a look at the other projects we have done with our tree so far this year:
Valentine Tree
Swedish Easter Tree
Recycled Cherry Blossom Tree
Coffee Filter Butterfly Tree 
Halloween Tree

Monday, November 11, 2013

Machine Quilting Negative Space with Angela Walters

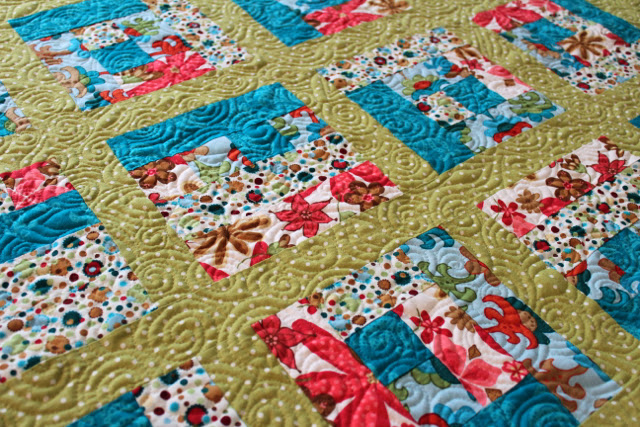
I recently purchased a class from Craftsy - Machine Quilting Negative Space with Angela Walters. It was a really inspiring class with so much information and ideas - all clearly and simply explained. In part of the class Angela shows you how to create a wide range of affects and patterns using swirls, circles & leave patterns. Angela is a born teacher - her emphasis is on simple patterns - that you should have fun with - perfection is not necessary. I was so inspired I grabbed this little quilt I have had lying around for ages and began swirling out a pattern on it.


I have long been pouring over Leah Day's Free Motion Quilting Project designs. But what I felt Angela showed so much more clearly was how to incorporate simple designs together and/or at different scales and voila you can create endless effects and designs. After I finished this portion of her class it was like 'ah ha' moment had clicked in my head and finally - finally - I seem to have made friends with my BSR foot.


I felt totally inspired and surprisingly confident at putting into practice what I had learnt after taking this Craftsy class online. I would recommend it it anyone who is learning to free motion quilt.


This little quilt was made from scraps I had left over from a fun little apron project in March 2009 and it is now available in my Etsy Store.

Tuesday, November 5, 2013

Memory Quilt: Recycled Baby Bedding

I was asked to make some new bedding for a family's little girl (5) who was graduating from her crib/toddler bed into brand new bunk beds. Her toddler bed had various bedding - a bed skirt, sheet, pillows & blanket.


We talked about what would be best and we decided that a duvet cover instead of a quilt would be most utilized.The aim was to make two matching duvet covers for each bunk.

I carefully took all the old bedding apart, washed it all, ironed and began to assess how much fabric we had. The family wanted a very classic calm design and we decided on plain squares - keeping them 5" in size so the duvets would seem classic but still modern.

I am pleased with the result. They look like something out of a Pottery Barn catalog. The flannel duvet covers are so soft and the weight of the quilted top make them feel very expensive - I'm not sure anyone would guess at first glance that these are a recycled project.
 
After I had pieced the tops I attached the quilted tops to cream flannel duvet cover top & added stitched detail using some Gutermann Heavy Duty Polyester Thread in straight lines.


I love how this looks - I will have to use this again on another project.


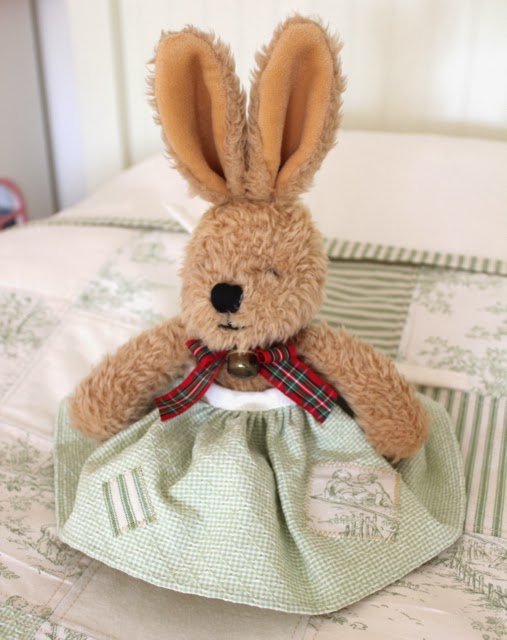
We still had a little bit of fabric left over so I made Teddy a little apron (happily modeled here by Felix the bunny)

 
.... and Teddy also got the cutest sleeping bag too (I haven't let my girls set eyes on this - I just know they would want thousands for all their stuffed toys!)


Here is the little package all together. Duvet on bed, 2nd duvet cover folded, Teddy's apron & Teddy's sleeping bag.


******

Other Recycled quilted projects:
Union Jack Sweater Quilt
9/11 Memorial Firefighters T-shirt Quilt
Memorial Uniform Quilt
Men's Cotton Shirt Quilt

Wednesday, October 30, 2013

Craft Pumpkins

I love Halloween. My husband does not understand my excitement over lit pumpkins and Halloween decor.

I think I have made it clear that I don't like to throw things away - but when it comes to real pumpkins I kind of faint at the price. Each year I buy a few more new craft pumpkins from Michaels when they are on half price. Each year I carve a few more and add them to our little display.


This year we have a few more additions to our own little pumpkin patch. 


A big mummy spider has joined the icky nest of baby spiders. 


Some scary pumpkin bugs have landed on the box woods. 


My favorite still is the pumpkin snake we made last year - he curls his way down the steps.

Every pumpkin you see in this picture is fake. We bag them up into large bin liners every year and store them in the garden shed until the next Halloween. I used to feel ashamed about my love for craft pumpkins until we visited the Pumpkin Garden at the New York Botanical Gardens - all their pumpkins are fake too!!

You can see more of my pumpkins from a post I made back in 2011!

Have a fun & safe Halloween tomorrow.

Tuesday, October 22, 2013

Tie Dye Sharpie T-shirt

I first saw this at Fun at Home with Kids (if you have little ones visit Asia's blog - you will never be stuck for ideas with your littles again!). As soon as I saw this idea and the results I really wanted to make a kids art quilt with this method - but first we tried T-shirts to see if we liked the results.

You draw on the fabric with the sharpies and then drizzle rubbing alcohol over the drawings - it is nothing more complicated than that. 

 
We liked the results A LOT!


The bunnies had a surprisingly long amount of concentration for using Mummy's 'special pens' and being allowed to draw on clothes (something I would never ever allow normally.)

Here are their t-shirts after they had finished drawing on them.

(Bunny #2 - 2 years old)

 (Bunny #1 - 4 years old)

Then it was time to add the magic water (rubbing alcohol - again something I would never let them get their hands on!) The colors spread so prettily - and they kept spreading & changing.  


At this point my 1st little bunny lost it completely insisting that her sister's t-shirt was much prettier than hers. She finally recovered for the photo shoot. Though I have to say - for a 2 year old I think her t-shirt more than rocks!


The dried t-shirts really are so pretty - even my husband (who rarely comments on such projects) said how pretty he thought they were.


I used a packet of (Sharpie Fine-Tip 80's Glam - pack of 24 sharpies). I have many fabric projects lined up for these guys. The project was really fun and practically no mess - only a bit of sharpie on the fingers. I would recommend this to anyone of any age!

Wednesday, October 16, 2013

Paper Roll Halloween Tree

We were all quite sad to take down our Coffee Filter Butterfly Tree. But we have had fun decorating our Halloween tree with paper rolls and tissues.


Creep crawly spiders live in our Halloween tree.


Mice live in our Halloween tree. 


Painted paper roll owls live in our tree. 


Twirly Halloween icicles (made from painted paper rolls) hang in our tree in pumpkin golds, purple and black. 


Strips of tissue hang in our tree while bats loom over head. 


I hope you are decorating for Halloween too!


Take a look at the other projects we have done with our tree so far this year:
Swedish Easter Tree
Valentine Tree
Recycled Cherry Blossom Tree
Coffee Filter Butterfly Tree

Tuesday, October 15, 2013

Two-tone Playsiks


Our coffee filter butterfly tree has gotten many a compliment (we sadly just took it down to make our Halloween tree.) If you remember we made many of our beautiful butterflies by simply dipping and hanging our coffee filters in liquid watercolors. I know I must seem mildly obsessed by dying silks but it did make me wonder if we could make play silks this way. Just dip the silk in two pots and let it sit there and soak up the colors.


In each container is filled with approx 16oz of hot water, 6oz of vinegar & a good squirt or more of food coloring. You can read more about dying play silks with kid friendly dyes here, here & here.


We left the silks to soak for 30mins or so.


The results were really quite pretty - I gave into the imperfections in the color and enjoyed the design that the process resulted in. 


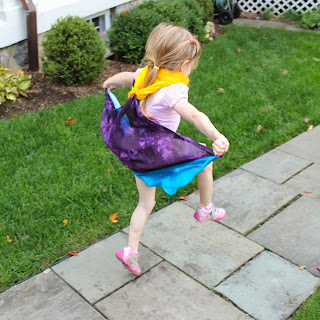
Here is Bunny #1 running around the garden pretending to be a butterfly. 


They also make really pretty neck scarfs.


Other dyeing fun we have had:
Tissue Dyed Silk Pillows
Two Tone Play Silks
Teacher Appreciation Gift: Home Made Play Silks
Easy Silk Scarf Dyeing with Tissue Paper
Kid Friendly Dyeing - Making your own Play Silks