Showing posts with label free. Show all posts

Monday, December 1, 2014

Tutorial: Santa Sack

I wanted to revisit a tutorial that I made back in November 2011 for home made Santa Sacks.

I don't know what your Christmas was like as a child - but one of my highlights was the stocking. The arrival of Santa (Father Christmas) and the stocking was huge. The stocking was one of my father's thread bare socks (it was not at all attractive.) So when we had children I knew that the stocking was going to be one of my little Christmas obsessions.


I had made a few of these sacks back in 2011 - but only kept 2. I knew when bunny #3 came along we would have to make another sack. I know he will notice Christmas this year - he fully understands the concept of presents now. In fact I am unsure how we will restrain him.

This new sack came together really really quickly and if you shop at JoAnns for cheap fun stuff these sacks came be made very inexpensively. I love the sacks - they are so cute. The girls sacks have held up really well AND they can fit a surprising amount of bounty in them.

My little chap was very pleased with his sack but could not understand why I was shoving his toys into it and asking him to hold it while I took photos. 


His older sister - bunny #2 - was all too eager to stick her favorite toys in and pretend it was Christmas!


So if you feel like making some sacks this year - either to use as stockings like we do - or as just pretty gift sacks please remember my tutorial which you can find here - it seems to still make sense (to little me at least!)

Wednesday, November 13, 2013

Thanksgiving Tree

It has become time again to change our seasonal tree. We took off the mice, spiders and cobwebs to make our Thanksgiving Tree.


I found some fake autumnal leaf vines on sale at JoAnn's and wound them around the bare branches. Then we picked out some yellow, orange, red, green & brown card and the girls mixed their own paint colors (from green, red & gold) and made hand-prints on the card. 


Once the paint was dry we cut out the hand-prints and hung them on the tree with gold ribbon.


On the back of each hand-print leaf my eldest bunny wrote all the things we were grateful for. Here is their very cute list:

the color green
pasta & meat
blankets
coloring
toys
Castro (our dog)
food
my sister & brother
my scooter
friends
color tree
blanket bunny
gold & silver glitter
TV
paint
chocolate
clothes
Mummy
Daddy
Ariel
bed
my beautiful children
garden
Cinderella
dressing up clothes
leaves
Hilda
Oma (German for Grandma)
Papa
Teddy
the whole entire world


Listening to the girl decide what they were thankful for was so cute - this might well be our new family tradition.

Take a look at the other projects we have done with our tree so far this year:
Valentine Tree
Swedish Easter Tree
Recycled Cherry Blossom Tree
Coffee Filter Butterfly Tree 
Halloween Tree

Wednesday, October 16, 2013

Paper Roll Halloween Tree

We were all quite sad to take down our Coffee Filter Butterfly Tree. But we have had fun decorating our Halloween tree with paper rolls and tissues.


Creep crawly spiders live in our Halloween tree.


Mice live in our Halloween tree. 


Painted paper roll owls live in our tree. 


Twirly Halloween icicles (made from painted paper rolls) hang in our tree in pumpkin golds, purple and black. 


Strips of tissue hang in our tree while bats loom over head. 


I hope you are decorating for Halloween too!


Take a look at the other projects we have done with our tree so far this year:
Swedish Easter Tree
Valentine Tree
Recycled Cherry Blossom Tree
Coffee Filter Butterfly Tree

Tuesday, October 15, 2013

Two-tone Playsiks


Our coffee filter butterfly tree has gotten many a compliment (we sadly just took it down to make our Halloween tree.) If you remember we made many of our beautiful butterflies by simply dipping and hanging our coffee filters in liquid watercolors. I know I must seem mildly obsessed by dying silks but it did make me wonder if we could make play silks this way. Just dip the silk in two pots and let it sit there and soak up the colors.


In each container is filled with approx 16oz of hot water, 6oz of vinegar & a good squirt or more of food coloring. You can read more about dying play silks with kid friendly dyes here, here & here.


We left the silks to soak for 30mins or so.


The results were really quite pretty - I gave into the imperfections in the color and enjoyed the design that the process resulted in. 


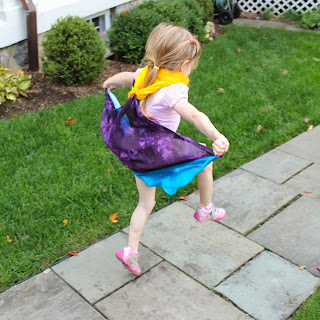
Here is Bunny #1 running around the garden pretending to be a butterfly. 


They also make really pretty neck scarfs.


Other dyeing fun we have had:
Tissue Dyed Silk Pillows
Two Tone Play Silks
Teacher Appreciation Gift: Home Made Play Silks
Easy Silk Scarf Dyeing with Tissue Paper
Kid Friendly Dyeing - Making your own Play Silks

Wednesday, October 9, 2013

Home Made Play Silks: Dyes from the Kitchen Cupboard

One of the really fun things we did this Summer was discover all the things we could dye play silks with (tissue paper & food dye.) We had so much fun dying them and then playing with them. Recently we have been playing a with red cabbage water experiments - which made me think what play silks would look like dyed with these mixtures.

And why limit it to cabbage water? In my cupboard we also decided to play with turmeric, paprika & beetroot.

Here is my little chemist ready to mix away to her hearts content with the cabbage water. The pink glasses are her safety goggles .....


Cabbage
  • Chop up red cabbage and add some bit water. Bring the the boil and simmer until cabbage is pale. Split the cabbage water into two pots. 
  • Add silk scarf and soak for 30mins to one pot. 
  • In the other pot add some vinegar - the mixture will turn dark pink - add silk scarf and soak for 30mins. 
  • Once your silk scarf has finished soaking in the first pot. Remove the scarf and add in baking soda (the mixture will turn greeny blue) - add silk scarf & soak for 30mins. 
Note: Cabbage water changes color depending on its PH. When they were washed & dried the colors became much less vibrant.

Silks soaked in with cabbage water before washing

Turmeric
  • Mix turmeric & water - bring to the boil - add silk scarf and soak for 30mins
Paprika
  • Mix paprika & water - bring to the boil - add silk scarf and soak for 30mins.
Beetroot
  • Boiled 3 chopped up beetroot in some water for about 40mins- puree everything together - add silk scarf and soak for 30mins. 

Cabbage Water = Soft Purple
Cabbage Water + Vingear = Soft Pink/Purple
Cabbage Water + Baking Soda = Silver Blue
Paprika = Gold (honestly - it is a gorgeous gold hue)
Beetroot = Cream
Turmeric = Bright Bright Yellow (just look at that yellow!! See below.)

Note: After we had soaked the silks I dried them on their own on the hottest setting on our tumble dryer (sanitize) and then put them on their own through a 20mins cold wash (no detergent) and dried them again on the hottest setting.  


I'm not sure we have anymore space for playsilks in our dress up box. I am playing with the idea of making a quilt from these. 


Other dyeing fun we have had:
Tissue Dyed Silk Pillows
Two Tone Play Silks
Teacher Appreciation Gift: Home Made Play Silks
Easy Silk Scarf Dyeing with Tissue Paper
Kid Friendly Dyeing - Making your own Play Silks

Tuesday, July 30, 2013

Coffee Filter Butterfly Tree

What we do with this branch we found in the garden never ceases to amaze me. In case you have missed the progression of our year long tree project check out the other trees we have made so far.

Swedish Easter Tree
Valentine Tree
Recycled Cherry Blossom Tree

This idea came to me as I was washing up looking out of the window and looking at butterflies flutter around the garden in the sunshine.


The colors in our butterfly tree are really amazing. 


As you can tell we made a lot of coffee filter butterflies for this tree (over 60!)

We decorated out coffee filters by various methods. The traditional markers & water, dipping the filters in liquid watercolors & glitter. 

 Folded & dipped in liquid water color. 

Water soluble markers & water. 

Dipping in liquid watercolors was by far the preferred method.


We had to hang washing lines all over the kitchen to dry all the filters. We also experimented about how we hung the filters to ensure we got lots of different results. 


Glitter glue added a magical sparkle and prevented the spread of the liquid water colors. Folding coffee filters and hanging them together or on top of each other gave different - but beautiful effects - colors leaking from all angles.


Even my 2 year old bunny enjoyed the activity.


Not very precise - although she really is trying - just look how carefully she is holding that filter. 


Our kitchen towels were soaked but ever so pretty once we had finished.


My eldest wanted to make butterflies with two filters at once. It was a genius idea - giving us some very large and full butterflies.


And we made some dragon flies too. 


You might be wondering what became of all those pretty tissue paper cherry blossoms. Well my girls loved gathering the 'fallen petals' and they are still playing with them. I'm thrilled - this tissue paper has had 3 uses so far - wrapping gifts to pretty tree blossoms to endless games of gathering, grouping and carrying around the pretty posies.


We left our little egg carton caterpillar on the tree - obviously one day he will turn into a butterfly too.


Happy butterfly spotting this summer!


***********

Please do not forget about the charity I Spy quilt - we are still looking for fabric 4"x4"scrap donations. 

Tuesday, June 4, 2013

Teacher Appreciation Gift: Home Made Play Silks

My girls go to a really sweet preschool. Next year they will be moving schools - so I wanted to thank their teachers for giving them such a lovely and happy experience. I asked their movement and music teacher if there was anything she would like for her classroom and what do you know - she wanted some colored silks for the movement classes!

We decided 30" square silks would be the best size as her classes range from just under 2's to 4+.

Again I used food colors to ensure the silks were super kid friendly. I used the McCormick Assorted Food & Egg Dye and the McCormick Neon Food & Egg Dyes.


I have posted a previous post about kid friendly dyeing techniques here. But to recap -  

- Soak silk in hot tap water with a glug of vinegar while you make your mixture. (I'm in a debate about whether soaking the silks before hand is really necessary - if I do this again I will try using dry silks.)
- Mixture: 1/2 bottle of 0.25oz food coloring with 16 ounces of hot tap water + 6 ounces of vinegar.
- Squeeze water out of silk and place silk in a pyrex bowl with the dye mixture.
- Leave it there and stir occasionally - you will see when the dye has been absorbed as the liquid will become a lot clearer - approx 20 mins - although we did leave ours hanging around most of the afternoon.


- Rinse in cold wash & dry on hottest cycle in tumble dryer.

Amazingly bright colors. My only disappointment was that the neon 'pink' and the assorted 'red' are practically the same hue.

TIP: If your silk ends up looking like this first try (I rushed it) do not panic - just make another mixture of dye, water & vinegar and resoak the silk.


You can see how bright the green came out (far left) on the second soak.