Showing posts with label kids craft. Show all posts

Monday, June 22, 2015

Kids Art Quilt: Tie-Dye Fabric

After finding a Ricky Tims Convergence Quilts book I thought it would be fun to do Tie-Dye with the kids and then turn the fabric into some quilts.


We used Tulips One-Step Tie-Dye Kit with 12 different colors in it. It was extremely simple to use and very little mess for dying with small children. I would highly recommend the product.


We used all the dye up. The instructions said we should leave the dye to set for 6hrs ... so we did - I wondered if it would allow the colors to bleed too much - but they didn't. 


We had a little bit of dye left so my eldest had fun squirting the leftovers onto two strips of fabric. 


The other great thing about the Tulip Kit was that is came with lots of different pattern ideas. 


We played with explosions, crosses, stripes, swirls and bulls-eye designs. 

We were too shy with the dye on the larger pieces of fabric. They look cool but I worry there is too much white on them for our 'convergence' quilt plan. 


We also took the opportunity to make some tie-dye t-shirts for Father's day that everyone wore proudly!


I hope you all had a lovely weekend too!

Our other kiddy led fabric projects have included:
Kids Art Quilt - Spin Art (WIP)
Kids Art Quilt - Sharpie Art Quilt
Kids Art Quilt - Fabric Building Blocks
Kids Art Quilt - Sun Painting (WIP)
Kids Art Quilt - Bess Beetle
Kids Art Gallery Quilt

Tuesday, April 14, 2015

Kids Art Quilt: Marbling Fabric

I have wanted to do marbling with the kids for a long time. With the endless winter weather we have found ourselves inside with a lot of time to fill

I purchased a Jacquard Marbling kit from Amazon. (As you will read this was a bit of a waste of money and a frustrating process.) We also used fabric paint from Jacquard - that I love. Really bright vibrant colors. We dropped the colors straight from the bottles.

For all our marbling I gave the girls disposable chop sticks that we ran through the mixture. We experimented with straight lines and swirly lines. 

Jacquard Marbling Kit (Methocel)
It took a long time to prepare - 45 mins+ which was not practical as the little people were keen and waiting to start. The methocel mix did not work without the suggested addition ammonia - a tatty addendum to the instructions was stuck in the box suggests adding ammonia if the methocel doesn't work properly. I didn't want to add ammonia - perhaps I'm a whimp but ammonia and kids 5 and under didn't sit well with me. It was a bit of a disaster. And yes I did get a little cross after trying this process 3 times!!! The paint in the kit was way too thick too and the girls got very frustrated trying to get the paint out.


Shaving Foam & Fabric Paint
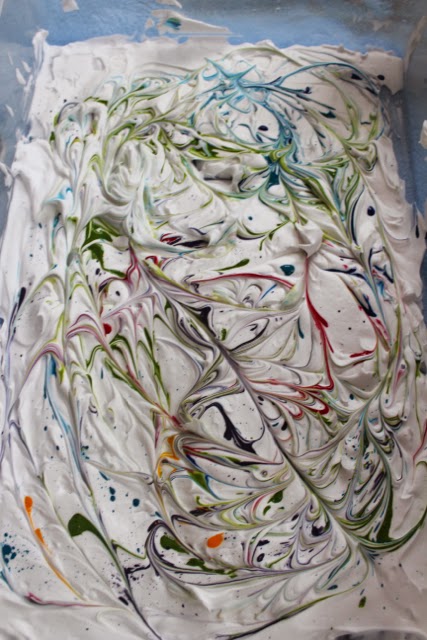
Spray in shaving foam into a flat pan add drops of paint on the top and mix.  The girls LOVED spraying the shaving foam - that was the highlight for sure. We got better 'marbling' when the shaving foam had some water added to it. But all the finished colors were very light.


Liquid Starch & Fabric Paint
This worked really well. The paint dispersed and looked amazing. But I think the liquid starch perhaps diluted the paint a little and the fabric paint washed out more than I would have liked. 


Fabric before heat setting and washing (above) and after (below)


Cornstarch & Fabric Paint
Amazing what cornstarch can be used for - but this was my favorite method for marbling by far. The girls loved mixing it. It suspended the paint well & looked amazing. It gave us the strongest color on the fabric.


Fabric before heat setting and washing (above) and after (below)


Once the fabrics were heat set,  washed and ironed the colors did dampen a little -  but I think they will be fun to work with - now I just have to figure out a design idea!


Friday, January 30, 2015

Cold Weather Kids Activities: Surfing Competition

It was snowing - too cold to play outside.

We found some cardboard and cut them into surf boards. The kids painted them (which was a surprisingly lengthy project.)


Tuesday, November 18, 2014

Tutorial: No Sew Hanging Tent for $20

We took our basic $20 hanging tent (tutorial below) and jazzed it up into a Frozen Hanging Tent with another whopping $6!


 What you will need
- 1 hula hoop (mine is 65")  - purchased from the Dollar Tree $1
- 3 packets of Ikea Lill curtains - $12
- Ribbon (not too thin) - two lengths of around 54" - mine are from my recycled ribbon bucket - but lets assume you can find something at the dollar store or JoAnn's bargain bucket $1
- 1 yard of fabric - $6
TOTAL = $20
(In this price I am assuming you have a small amount of some sort of glue in the house at hand.)


Variations on a theme ....  
Any curtain panels with a rod pocket can be used for this project. I really wanted to use some pink & purple sparkly sheer panels I had spied on JCPenny.com. But the budget won out. I think there could be a million ways you could take this tent with different fabrics and different panels. We also used one of our play silks we had dyed with red cabbage and baking soda as the canopy fabric. It was the perfect icy color our tent needed.


1) Fold your two ribbon lengths in half and make a knotted loop in the middle. (I knotted my lengths at 5" from the middle which yeilded an approx 3" loop.) Knot both lengths and put them aside.  NOTE: I used two 54" lengths but if your hula hoop is wider you will probably want to use a longer length. 


2) Open your hula hoop at the join and thread on all your curtains - secure the hula hoop back together again once you have the panels on the hoop.


3) Tie the lengths on ribbon onto the hula hoop. Make sure all the lengths of ribbon are equal in length. You can tie between panels or thread the ribbon through the curtains. Totally up to you - I did both. 


4) Turn your yard of fabric into a square (36"x36") and make a small hole in the center. Thread the knotted ends of ribbon through the center of the fabric. NOTE if your hoola hoop is bigger than mine you might need to use a bigger piece of fabric. 


5) Use dots of glue (glue dots, fabric, glue gun, super glue etc) to secure the canopy to the top of the curtains/hula hoop - creating any folds/draping etc as you go if you wish.

6) Ways to embellish your tent:
 - Glue lengths of ribbon to the outside of the curtains. I used 4 packets of 50 cent ribbon from JoAnn's - ($2) & some blue recycled ribbon from my stash.


 - Add flowers, butterflies, snowflakes etc to 'theme' your tent. I used 4 packets of plastic snowflakes from the Dollar Tree ($4) to make a 'Frozen tent'.

 
- Fairy or other novelty lights - I used some from our Christmas tree box.


We had a full on Frozen reenactment. In case you wondered how Anna really found Elsa's castle - she came on a pink scooter ....


Let it go, let it go .....


Snow is falling everywhere ....


Stay away Anna .....


Sisterly love can conquer anything ..... after all we all like warm hugs!


And when the daylight fades - the warm hugs continue.


Wednesday, July 16, 2014

Kids Art Quilt: Sun Paintings

I have been working on the last Kids Spin Art Quilt and a quilt made with Bunny #1's first fabric line - I should really finish & quilt them .... and I can make all the excuses in the world to why we haven't completed them yet - but it seems a fact of life these days that my personal projects seem to take a back seat these days.

So like any insane person - I decided to add another project to my 'to be completed list'. This was a really fun & easy project to do with my young bunnies. I wish that I had taken more photos of the kids doing the project rather than the end results - but between fabric dye flying around, helping them cover the fabric, food stuffs being thrown everywhere & there being 3 of them and only one of me - it was a tad hectic - really fun but a wee bit hectic.


After painting the fabric and leaving the pieces in the sun for about 2+ hours (until they were completely dry) I put them through the hottest cycle in the tumble dryer, washed them in a warm wash and dried them again on the hottest setting in the tumble dryer.

What we used:
  • Setacolor Transparent Paints (diluted approx 1 part paint to 1 part water)
  • Brushes & paint cups
  • White Cotton
  • Random selection of things from the house - pasta, cereal, oats, rice, plastic lids, cardboard stencils, glass pebbles etc
We laid out our cotton fabric on damp plastic tables in the shade (it is important you are not in the sun for the painting bit.) The fabric stuck nice & flat on the wet tables. After we had finished the project the tables were a bit of a mess - most of the color came out with a bit of soft scrub. If we do think again (which we surely will) I will be mounting the fabric to cardboard so they are easier to carry & the cardboard can be discarded after they have been finished with. 


Bunny #2 (3 years old) got bored trying to cover all the fabric on her own - she really needed help to cover all the fabric. But when she says she is done there isn't much you can do to change her mind. So her first painting was 'mostly' purple and then she emptied a ton of rice onto it.

BEFORE


AFTER


Bunny #1 needed help to cover the fabric too but was fully into the decorating the fabric. Her first piece of fabric we used a heart cardboard stencil in the center and plastic lids to make circles.

BEFORE


I think we might have diluted her paint too much as her spots are not as bright as I would have liked them to be.

AFTER


This is the only one I painted. Pink with yellow spots and the kids threw swirly pasta all over it.

BEFORE


Looking at the results - Bunny #2 has the right approach - more decorating is better. 

AFTER


Then we decided to paint some stories.  Bunny#1 painted a beach, sea & sunset. She used a cardboard stencil for the sun, piles of oats for the clouds, spaghetti for seaweed, more oats for sand and glass pebbles for stones.

BEFORE


AFTER


Bunny #2 is really into mermaids so she painted a sea & sunset - she actually poured the yellow color on. We didn't have a mermaid stencil so she settled on a dolphin and a fish, glass pebbles for rocks and piles of oats for clouds. 

BEFORE


AFTER


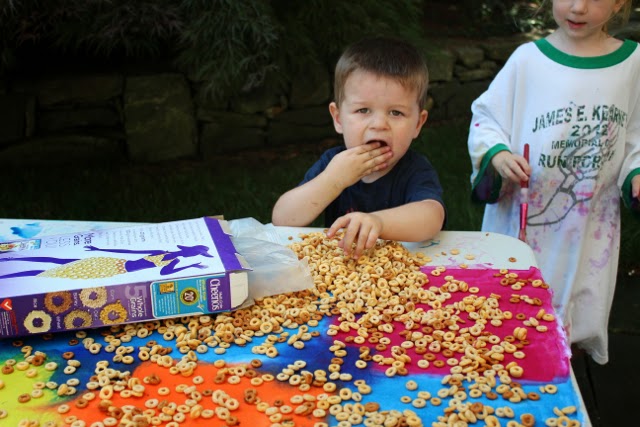
Here is Bunny #3 helping to distribute some cheerios over the a piece of cotton painted in blocks of different colors. (I really wouldn't suggest allowing your kids to eat Cheerios off of fabric paint.)

BEFORE


AFTER


And Bunny #1's final art work of a rainbow, sun & clouds. She was very definite that there should only be two pasta bows - one for the sun & one for the rainbow - the clouds are made from piles of oats again.

BEFORE


AFTER


I'm going to make 2 quilts one of each of the girls out of these prints - want to know what the quilts will look like? Stay tuned!