 I rather like the contrasting color - which is also picked up in the bias tape on the smock.
 Big question - do the smocks really need a pocket/pockets?

Adventures in free motion quilting
I rather like the contrasting color - which is also picked up in the bias tape on the smock. Big question - do the smocks really need a pocket/pockets?

 You make the blocks by sewing strips onto a piece of square paper - trim the block - remove the backing paper and then sew all the blocks together. Elizabeth H. warns you that as the edges of the blocks have been cut on the bias they will be prone to stretching when you sew them together - so I kept the paper backing on while sewing the blocks together. It has been working really well - no stretching - my blocks are still squares.
 This is a peek at the first half that has been sewn all together.
  I used up so many scraps - greatly pleased with finally using some up. But I'm just terrified of the prospect of quilting the beast ... I will let you know when it is finished.
 I have been dying to make these Heart and Lollypop Flowers every since I purchased Martha Stewarts Homemade Holiday Crafts. Well Valentine's Day is nearly here and I thought they would be very cute for Bunny #1 to give to her class mates. Of course - I can never tackle a project without making some 'improvements' of my own. Here is my version of this project.
  I didn't know whether this post should be a 'pillaged but much improved idea from Martha Stewart' post or an honest tutorial. I'll let you be the judge! But here is what you will need:
 - lollypop
 Fold your paper hearts in half and then fold the sides down again - to make little arrow/airplane hearts.
 Thread these onto your lollypop stick - rotating their position as you go.
 Cut out your leaf shapes and score a line down the middle of each leaf. This line does not need to be straight. Put a hole punch in the end of each leaf and thread onto the lollypop stick. A field of valentine lollypop flowers.
 I learnt my lesson with little fingers tugging apart the Candy Cane Mice and this time I have wrapped each lollypop flower in some cellophane, with some pink ribbon and a little heart gift tag.
 A simple neckline for easy on and off.
 Three growth tucks so the nightdress will last a long time.
  I'm pleased with the results - and I dearly hope they fit both girl and doll well.

 I repeated this layering process until I had used a total of 12 bags - 6 layers of plastic at each corner. I used one of the logo fronts on top of 4 other layers of plain white bag to make a type of binding tape for the project. Once all my bags were fused together I trimmed the edges and was left with an oblong shape.


 ... using this book.
 ... design is from this book.
 ... into one of these (I can not see me having any time for such a project - but I really really want to do this.)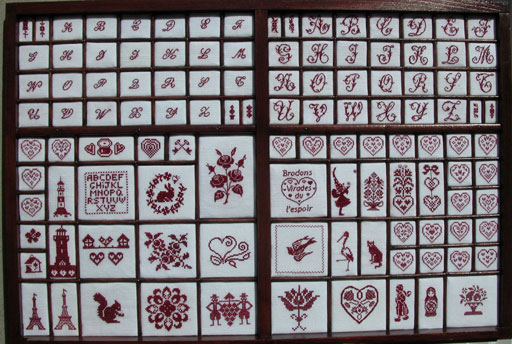


 Its not to late to add those cute finishing touches to the presents all wrapped up under the tree. I like to keep all bows and cards from any occasion and recycle them. This year I have recycled the ribbons and cards from holidays gone by.
 It really takes no time at all to make your own gift cards and it is great to recycle. Use normal scissors or pinking shears, a hole punch and a bit of ribbon. Some of them are so cute they could pass as brand new gift tags!

