Showing posts with label patchwork quilt. Show all posts

Thursday, May 15, 2014

I am having a little R&R so here are some photos

I've been working really hard at the moment but not on much I can share .... I also recently had my thyroid removed which has been simple enough (apart from the damage to my vocal chords leaving me sounding like a very small squeaky toddler with a serious smoking habit!) So I have been looking for things I could share with you. Until I can show the interesting secret stuff ....


I recently went to my first quilt show - the Quilt Fest of New Jersey X which was held in New Jersey in March of this year. I was lucky enough to meet my stepmum there - Jennie Rayment - who was judging, teaching, lecturing and the featured artist. It was wonderful to have Jennie there to walk me through the exhibit explaining why certain quilts got certain awards and what if anything could have made them better. It was really educational - as well as great to see the lovely lady herself.

Here is Jennie in action explaining her tucking and twiddling techniques to eager visitors.

 I was very excited to immediately spot this quilt by Michael Michalski - who is also a new member of the NYC Metro Mod Quilters. I missed seeing this in person at a guild meeting - so I was thrilled to see it up close in person.  It won an honorable mention - I felt it deserved more. Michael uses Electric Quilt 7 to create his designs. I am so tempted to explore this software. Has anyone else used it? Liked it? Sees value in it?

 This was the best in Show from the Mid Atlantic Quilt Festival XXV. Quilted by Laura Trenbeath - it was stunning. The quilting was AAamazing. The added notions gave even more of a shimmery gold sheen.  I studied her quilting for quite some time. I want to be this good. I dream about being this good. My aim is to be this good ..... quilting that is - I'm not sure the piecing part of patchwork has me fully hooked yet!

I loved this quilt from the moment I saw it. It is my BJ Titus . I am not going to say why this one did not get an award as I don't agree with the reasoning at all. If I was a judge this would have been one of my favorites.

 I liked this quilt as there are 75 different materials used in this quilt. 75 different fabrics shows an amazing attention to detail if you ask me. I admire attention to detail - something I lack a lot of the time. This quilt was made by Maxine Burkholder and won an honorable mention.

Ok so this quilt isn't hanging in a particularly flattering way and is lacking something but all I could see was potential potential and I wished that I had had an opportunity to quilt it as the huge amount of negative space (space - get it?) and swirling planets. I saw adding shimmering swirling threads etc giving more movement & depth to the piece. (I didn't note who made this quilt.)

This was a beautiful quilt offered for sale by Pat Bishop called Spring Woods. 

I failed to make a note of who made this. But what fascinates me is the use of a voile or something similar as an overlay to make the fabrics a different color in some areas. The quilting was also gorgeous & very detailed. (I am now searching for things to put over fabric to change its color when quilting.)

Another quilt for sale - a beautiful landscape - I would really like to learn how to make landscapes - the detail and the mingling of colors and the added stitch detail. All yummy. I need at least another 12hrs on each day to fit all these things in .....

This is a snap shot of another quilt that was made from velvet & silk. The texture on the quilt was divine - my photo doesn't do it an inch of justice. Since seeing it I have been obsessing about quilting vast quantities of white velvet & silk ..... 

.... it is a bit dangerous going to these places and bombarded with inspiration, fabric lines & other fabulous ideas. I feel my head, workroom & wallet would all be in a better state if I just stayed at home & didn't go exploring ;-)

Monday, May 5, 2014

Tutorial: Sixty Minute Split Strip Quilt

And try and say that in a hurry!


-->
Sixty Minute Strip Quilt 
(Top only  - twin size.)

Material needed for top:
~ 5 yards of different fabrics – cut into 5” width strips (making the strips wider gives the quilt a more modern bolder look)
~ or 35 x 5” WOF strips to make a scrappy version.


- Sew all your strips together into one big strip – mixing up the materials in random or in a pattern 

- Fold your long strip in two and sew along the right edge – when you reach the end/or fold – cut the bottom

-  Continue folding the strip and sewing along the right edge & snipping the bottom until you have 16 strips sewn together.  


- The width of your quilt so far should be approx. 72” - measure 72” up the quilt and cut straight across. You will have 1 x 72" square and 1 x rectangle approx 72" wide. 

- Turn the 72” square 90 degrees and sew the cut off strip back onto the square. 


- Baste & quilt your quilt. 


- Trim & square corners.


- I  added a cute pink ribbon & bow at the 72” seam point (as this was made for a 7 year old) – but you don’t need to do this.

- Bind your quilt. 

The sewing for this quilt top only took me a little under 60mins. It would be an easy last minute project to make in a night .

Monday, April 16, 2012

Baby Girl Playmat

Another project finished and my first photos outside this year! I had forgotten how bumpy grass can be for photos! A little quilted play mat for a baby girl. I added some tags in the top corner to hook those little baby toys to. This quilt is made from the scraps left over from my scrappy Valentine Quilt (yet to be quilted - that is still on the list of to-do's.) I haven't done any free motion quilting for a while - but I didn't feel too intimidated tackling this piece.I hope it will be enjoyed by the little lady who is due to arrive soon.

Wednesday, February 8, 2012

WIP: Quilt update

I've been making progress on my scrappy Valentine Quilt (Elizabeth Hartman.) I'm really pleased how it is looking. Here it is all laid out - ready to be sewn together. You make the blocks by sewing strips onto a piece of square paper - trim the block - remove the backing paper and then sew all the blocks together. Elizabeth H. warns you that as the edges of the blocks have been cut on the bias they will be prone to stretching when you sew them together - so I kept the paper backing on while sewing the blocks together. It has been working really well - no stretching - my blocks are still squares.

I found this wonderful pillow from Little Blue House on a Hill - which seems like a great idea for a smaller project using this technique/pattern.
This is a peek at the first half that has been sewn all together. I used up so many scraps - greatly pleased with finally using some up. But I'm just terrified of the prospect of quilting the beast ... I will let you know when it is finished.

Friday, September 30, 2011

Dolly

Meet Dolly - she is quite an important little character in our lives.Before I had children I had lots of - some might say 'daft' and 'bold' ideas about how I would raise my children - such as we would never have a DVD player in the car (utter godsend and sanity saver on long trips with grumpy and mildly unreasonable toddler) ... and I would think things like - play would only be with wholesome wooden or fabric toys - no plastic dolls would be allowed. Needless to say since having the girls I fully appreciate you should never say 'never' before actually experiencing the challenges of child rearing first hand!

When Charlotte started nursery school my heart melted to see her play so tenderly with dolls - coupled with trying to find a way to get her to tolerate bathtime - we got Dolly. Dolly came with a pink plastic fantastic bath set and since Dolly's arrival bathtimes have been fun. Dolly has helped Charlotte with bathtime, with the birth of Catherine (everything Catherine needed Dolly needed it too), doctor visits, meal times etc. Dolly comes for walks with us, to the store, on vacation ... you name it Dolly has been a part of it.

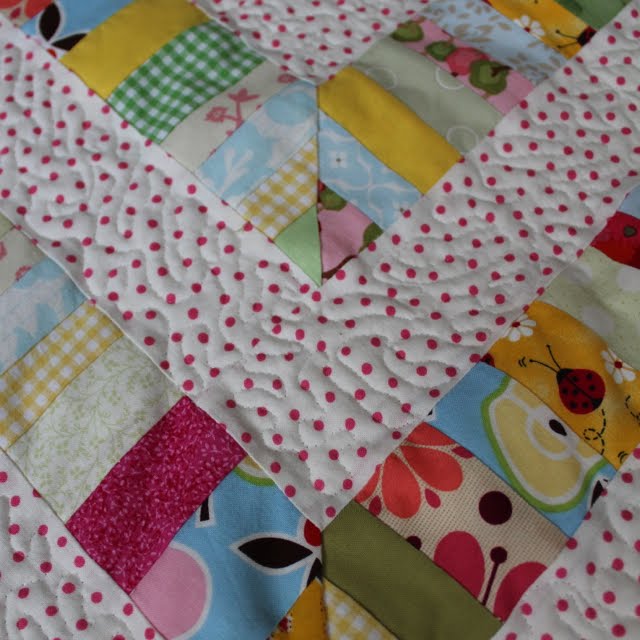
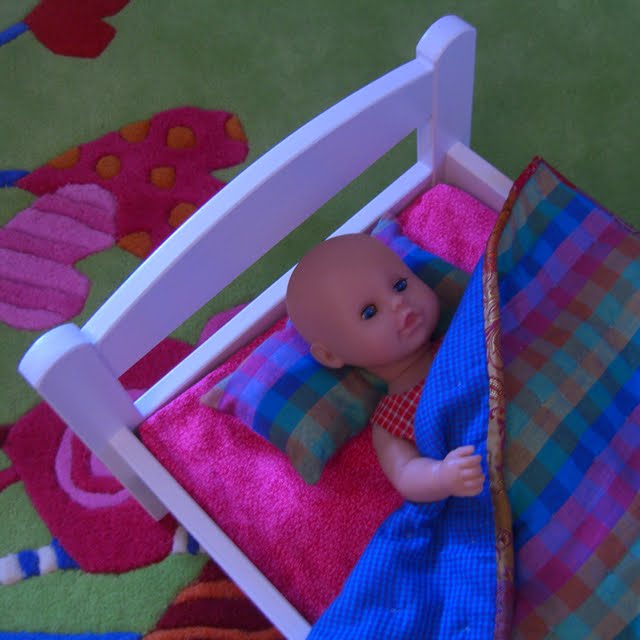
Up in my disorganized craft room (I'm still looking for insight if you have any more input to add) I have a very large bin full of scraps of material (I crazily keep almost every scrap thinking there might be a use for it one day.)I decided to make Dolly a little scrappy quilt and matching pillow.Any straight thinking person might have decided on the doll's bed before spending those valuable nap times slaving away over a tiny quilt ... I thought a shoe box or something would do - however on a craft room inspiration/reconnaissance mission to Ikea I stumbled upon this doll's bed. With a lick of white paint - I feel like this was money well spent. I recovered the supplied mattress pad with a bright pink cotton print and added a couple extra layers of batting - after all - Dolly needs to be as comfortable as possible! After all my efforts I really felt Dolly's new quilt was just a bit too small for the bed.A little devastated and guilt ridden for our loyal friend - I set about making some (3) more little quilts (please note #2 quilt will not be shown for pride reasons!) ...
... #3 quilt was out right rejected - although the pink pillow was well received ...
... and I was barely allowed to put #4 quilt on the bed. (I really rather like this little number - perhaps Teddy will be allowed to use it - instead of tying the quilt layers together by hand I used Bernie - it was so quick and neat I shall be using the technique again.)So in the end Charlotte loved the first quilt I made - what was I so worried about? My sweet little girl is currently taking a nap in her bed - and beside her is her beloved Dolly in her bed with her new quilt.

Saturday, August 6, 2011

A Fabulous Tea Party and a retrospective of sorts ...

I'm elated. I'm crafting again. It feels SO good - I really had forgotten how much happiness having a creative outlet brings me.

But I really have been a bit busy - the kind of busy where you collapse into bed each night wondering where the day has gone. Repeat this endlessly - and occasionally cry about it ;-) So to recap this is what I have been up to:
  • Packed and moved - twice - or was it three times? - I lost count - it feels like six.
  • Lived (pregnant) in a 300 sq ft studio apartment above a garage with husband, small toddler and a dog while we renovated the house (noise and dust like you would not believe).
  • Moved into not yet completed renovated house (heavily heavily pregnant).
  • Attempted to unpack and arrange furniture before baby arrived while drilling, painting etc still went on around us.
  • Had baby#2 (after 2 months of 'false' labor - Note: there is nothing 'false' about false labor).
  • Continued renovation and continued to unpack while looking after two adorable and much loved small children.
  • Eventually (very recently) managed to unpack Bernie and felt a renewed level of happiness - even though I was only mending husbands shorts and g-diaper covers.
  • Begged, pleaded and cajoled baby to nap at the same time as small toddler so I could have a small amount of time to myself each day.
  • Won the nap battle with baby - hurrah!!
  • Took a deep breath.
  • Decided to make this tea party set.
I wanted to make a fun coordinating tea party set that would help any little girl throw a most excellent and very proper tea party. The fabrics I used for this project were all left overs from previous projects (A Lucky Baby Bunny (Nov '09), How do you work? (Aug '08) and Swap Shots (July '08) - seriously? have I really had everything packed up and stored away for that long?)

The set consists of a picnic mat, an apron, a tea towel, a tea cosy, 6 napkins and 6 party hats.I embellished with pink ribbon and lace.
Party hats ready?
Hostess ready?
Tea brewed?
What a fine tea party! The cupcakes are from my Cupcake Tutorial made back in May 2008 - I must make more of those.

Anyone remember the knitted Bunny Picnic? ... I can't believe that was back in May 2008 ... time just rushes by.