Showing posts with label fabric. Show all posts

Tuesday, April 14, 2015

Kids Art Quilt: Marbling Fabric

I have wanted to do marbling with the kids for a long time. With the endless winter weather we have found ourselves inside with a lot of time to fill

I purchased a Jacquard Marbling kit from Amazon. (As you will read this was a bit of a waste of money and a frustrating process.) We also used fabric paint from Jacquard - that I love. Really bright vibrant colors. We dropped the colors straight from the bottles.

For all our marbling I gave the girls disposable chop sticks that we ran through the mixture. We experimented with straight lines and swirly lines. 

Jacquard Marbling Kit (Methocel)
It took a long time to prepare - 45 mins+ which was not practical as the little people were keen and waiting to start. The methocel mix did not work without the suggested addition ammonia - a tatty addendum to the instructions was stuck in the box suggests adding ammonia if the methocel doesn't work properly. I didn't want to add ammonia - perhaps I'm a whimp but ammonia and kids 5 and under didn't sit well with me. It was a bit of a disaster. And yes I did get a little cross after trying this process 3 times!!! The paint in the kit was way too thick too and the girls got very frustrated trying to get the paint out.


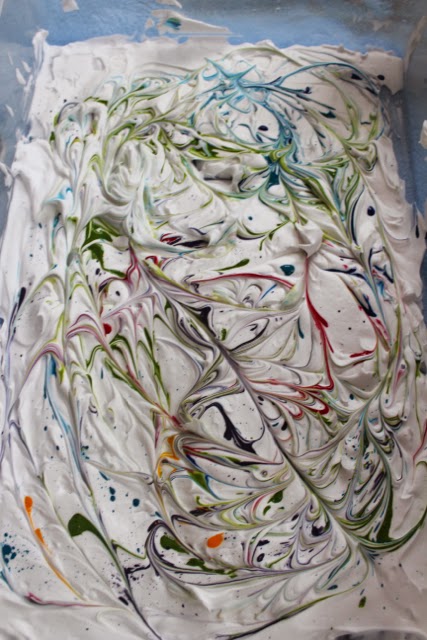
Shaving Foam & Fabric Paint
Spray in shaving foam into a flat pan add drops of paint on the top and mix.  The girls LOVED spraying the shaving foam - that was the highlight for sure. We got better 'marbling' when the shaving foam had some water added to it. But all the finished colors were very light.




Liquid Starch & Fabric Paint
This worked really well. The paint dispersed and looked amazing. But I think the liquid starch perhaps diluted the paint a little and the fabric paint washed out more than I would have liked. 


Fabric before heat setting and washing (above) and after (below)


Cornstarch & Fabric Paint
Amazing what cornstarch can be used for - but this was my favorite method for marbling by far. The girls loved mixing it. It suspended the paint well & looked amazing. It gave us the strongest color on the fabric.


Fabric before heat setting and washing (above) and after (below)


Once the fabrics were heat set,  washed and ironed the colors did dampen a little -  but I think they will be fun to work with - now I just have to figure out a design idea!


Monday, December 1, 2014

Tutorial: Santa Sack

I wanted to revisit a tutorial that I made back in November 2011 for home made Santa Sacks.

I don't know what your Christmas was like as a child - but one of my highlights was the stocking. The arrival of Santa (Father Christmas) and the stocking was huge. The stocking was one of my father's thread bare socks (it was not at all attractive.) So when we had children I knew that the stocking was going to be one of my little Christmas obsessions.


I had made a few of these sacks back in 2011 - but only kept 2. I knew when bunny #3 came along we would have to make another sack. I know he will notice Christmas this year - he fully understands the concept of presents now. In fact I am unsure how we will restrain him.

This new sack came together really really quickly and if you shop at JoAnns for cheap fun stuff these sacks came be made very inexpensively. I love the sacks - they are so cute. The girls sacks have held up really well AND they can fit a surprising amount of bounty in them.

My little chap was very pleased with his sack but could not understand why I was shoving his toys into it and asking him to hold it while I took photos. 


His older sister - bunny #2 - was all too eager to stick her favorite toys in and pretend it was Christmas!


So if you feel like making some sacks this year - either to use as stockings like we do - or as just pretty gift sacks please remember my tutorial which you can find here - it seems to still make sense (to little me at least!)

Wednesday, July 16, 2014

Kids Art Quilt: Sun Paintings

I have been working on the last Kids Spin Art Quilt and a quilt made with Bunny #1's first fabric line - I should really finish & quilt them .... and I can make all the excuses in the world to why we haven't completed them yet - but it seems a fact of life these days that my personal projects seem to take a back seat these days.

So like any insane person - I decided to add another project to my 'to be completed list'. This was a really fun & easy project to do with my young bunnies. I wish that I had taken more photos of the kids doing the project rather than the end results - but between fabric dye flying around, helping them cover the fabric, food stuffs being thrown everywhere & there being 3 of them and only one of me - it was a tad hectic - really fun but a wee bit hectic.


After painting the fabric and leaving the pieces in the sun for about 2+ hours (until they were completely dry) I put them through the hottest cycle in the tumble dryer, washed them in a warm wash and dried them again on the hottest setting in the tumble dryer.

What we used:
  • Setacolor Transparent Paints (diluted approx 1 part paint to 1 part water)
  • Brushes & paint cups
  • White Cotton
  • Random selection of things from the house - pasta, cereal, oats, rice, plastic lids, cardboard stencils, glass pebbles etc
We laid out our cotton fabric on damp plastic tables in the shade (it is important you are not in the sun for the painting bit.) The fabric stuck nice & flat on the wet tables. After we had finished the project the tables were a bit of a mess - most of the color came out with a bit of soft scrub. If we do think again (which we surely will) I will be mounting the fabric to cardboard so they are easier to carry & the cardboard can be discarded after they have been finished with. 


Bunny #2 (3 years old) got bored trying to cover all the fabric on her own - she really needed help to cover all the fabric. But when she says she is done there isn't much you can do to change her mind. So her first painting was 'mostly' purple and then she emptied a ton of rice onto it.

BEFORE


AFTER


Bunny #1 needed help to cover the fabric too but was fully into the decorating the fabric. Her first piece of fabric we used a heart cardboard stencil in the center and plastic lids to make circles.

BEFORE


I think we might have diluted her paint too much as her spots are not as bright as I would have liked them to be.

AFTER


This is the only one I painted. Pink with yellow spots and the kids threw swirly pasta all over it.

BEFORE


Looking at the results - Bunny #2 has the right approach - more decorating is better. 

AFTER


Then we decided to paint some stories.  Bunny#1 painted a beach, sea & sunset. She used a cardboard stencil for the sun, piles of oats for the clouds, spaghetti for seaweed, more oats for sand and glass pebbles for stones.

BEFORE


AFTER


Bunny #2 is really into mermaids so she painted a sea & sunset - she actually poured the yellow color on. We didn't have a mermaid stencil so she settled on a dolphin and a fish, glass pebbles for rocks and piles of oats for clouds. 

BEFORE


AFTER


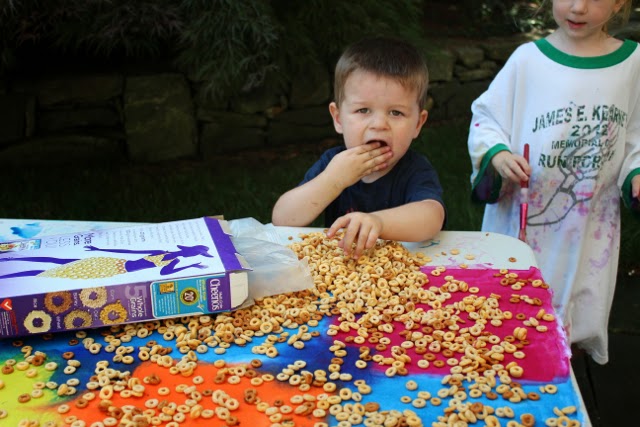
Here is Bunny #3 helping to distribute some cheerios over the a piece of cotton painted in blocks of different colors. (I really wouldn't suggest allowing your kids to eat Cheerios off of fabric paint.)

BEFORE


AFTER


And Bunny #1's final art work of a rainbow, sun & clouds. She was very definite that there should only be two pasta bows - one for the sun & one for the rainbow - the clouds are made from piles of oats again.

BEFORE


AFTER


I'm going to make 2 quilts one of each of the girls out of these prints - want to know what the quilts will look like? Stay tuned!

Thursday, April 24, 2014

WIP: Kids Art Quilt: Turning Your Kids Paintings into Unique Fabric


Here is my 5 year old's first fabric line. We couldn't be more excited!!


The fabric is printed using Spoonflower.

Here is the original painting - all the fabrics are from this one painting. 


I scanned the painting and imported it into iPhoto. I changed the tint, contrast etc to make a pink & blue version of the painting. Then I uploaded the 3 different files to Spoonflower. 


You can see here how changing the repeat of the fabric and the design size can change the look of the fabric. 


The first thing I did when the fabric arrived was to wash it. It was a tad stiff from the printing process. I washed the fabric in a little synthrapol on a standard warm wash - I also added a little fabric softener. This certainly helped to soften the cotton quite a lot. I'm looking forward to sewing with it - but at the same time terrified of cutting into it!!

Spoonflower is really easy to use. I'm so excited by the potential of all the kids art projects being turned into wonderful unique fabrics. I still can't believe one painting made all these different fabrics.


Friday, February 14, 2014

Memory Pillows: 9/11 Firefighters Memorial Quilt

It has been a while now since I presented the Memorial quilt I made for the only Fire Marshal to loose his life in 9/11. It was such a great project.

When I work with families on quilts I always keep every single scrap until I know what the families want to do with them. And by every last scrap I mean EVERY label, button, seam, tiny sliver - everything is kept together until I know what the families wishes are.


On this occasion the family asked for two small cushions - one for each of the grandchild.


I made two 15" cushions from mixing the left over t-shirt scraps with some regular polyfill. For the pillow covers I used the same material as the quilt - it is a cute pale yellow cotton polka dot. I took some larger scraps and cut some hearts out and quilted the front of the cushions in the same way that the quilt had been quilted (echoed lines.) The cushions are really sweet and will look super cute with the quilt.


The cushions weigh quite a bit due to their filling - it made me think about the weight of love - how heavily we can love people. My thoughts are with the family of the heroic Ron Bucca this valentines day.